Sunday, May 4, 2014

Money Mining

In the good ole days, you could be a pretty successful Bitcoin (cryptography based currency for geeks) miner simply by running a program on your desktop computer. But with the way the algorithms work and the increasing complexity of the cryptography, these days you need dedicated hardware to be successful.

I'm too late to this game to make any significant coin, but I figured that since I am both a computer geek and a financial type, I should at least be able to say that I have mined a Bitcoin.

So I bought a couple of ASIC usb miners and gave it a try.

First I used an old Windows XP laptop to get the mining software, pooled mining account, and bitcoin wallet all set up since I don't necessarily trust all of the programmers and participants in all of these operations. Downloading these kinds of things always makes me a little nervous.


Once I had everything all sorted out, I switched out the relatively power hungry laptop for the versatile, trendy/nerdy $35 computer-the Raspberry Pi. The powered usb hub is powering the 2 miners, the Raspberry Pi, and the cooling fan. The whole operation is running off the hub's 3 amp power supply. This makes for a very low power consumption rig. I can log into the Pi from another computer/tablet/phone to see how things are going.


I found a space for the rig next to my printer and wireless router. Now I just wait and watch the Bitcoins roll in.

Saturday, May 3, 2014

DIY Mattress


The modern american mattress is a ridiculous thing.

People have been building and destroying empires for thousands of years all while sleeping on various sorts of mats and piles of animal hair and plant fibers. For a while there, they strung ropes across wooden frames with a bag of animal hair on top. Every so often they would untie the ropes, tighten them and re-tie the knot so that the bed wouldn't sag down to the floor where the bugs were. "Sleep tight, don't let the bed bugs bite."

In some parts of the world there are still craftsmen that make mattresses for a living. The man makes you a mattress once and you keep that mattress your whole life, occasionally taking it back to him to be re-carded and re-stuffed.

When we got married, we did the sensible thing. We went out and bought an innerspring mattress from a department store. It wore out. Rebuilding it is not even an option. Which is a shame considering what we paid for it.

So I did some thinking and some research (how I found out all those tidbits above) and decided that the only group of people who seem to be even remotely happy with their beds are the foam mattress people. And I discovered that there is an outrageous markup on foam mattresses and that you can buy the foam direct from the foam manufacturers as opposed to the mattress companies.

Long story short: I made my own mattress out of 6 inches of high density polyurethane foam for the base and 4 inches of 5 lb memory foam. I encased it in a soft, stretchy jacquard velour case (similar to Tempurpedic's) I found on ebay. If I really wanted to be tricky, I could have ordered a replacement Tempurpedic case, but they want too much money even for the cases. If you were to buy a basic name brand memory foam mattress you would get pretty much the exact same thing, only the two slabs of foam are glued together, and they put a slightly nicer case around it and of course you would pay 3 or 4 times as much as I paid. I chose not to have the slabs glued together so that I can change out one layer or the other if needed. Once it is all zipped up, you can't tell the difference anyway and since altogether it weighs over 130 pounds, being able to move the awkward floppy slabs separately helps.

The finished product:


The memory foam test:


I considered a cheaper knock-off memory foam mattress, but I learned that they use inferior grades of foam. My mattress was only about $100 more than the knock offs I found online, but I knew that I was getting the top grade foam for both the base/support layer and the memory layer.


Wired Networking

Sometimes you fix one problem only to create another. After having built such a nice system in the living room for recording cable TV (see previous post), the bedroom TV was feeling a little left out. Fortunately, by adding a "Windows Media Center Extender" like an XBOX 360 to the bedroom TV, we can extend all of the living room HTPCs functionality into the bedroom. That is, we can schedule a recording in the living room and watch it later in the bedroom, or vice versa. This works out much better than having two HTPCs because you only have to schedule a recording once, you don't have to worry about "oh I set it to record in the living room, but I want to watch it in bed right now." And XBOXs are cheaper than HTPCs.

So the second part of the problem is that while wireless technologies have come along way, there are times such as when streaming high definition video when it is just better to have a wired network connection.

I've gotten some good practice at wiring the house with ethernet cable. Shortly after we moved in, we realized that with the wireless router in the office, we didn't get a very good signal in the bedroom. So I set up a router in the office and another in the living room with a wired bridge in between. I use an existing coaxial tv cable to pull new cable up into the attic. I then cut a hole for an "old work" electrical box, and pull the other end of the cable down in another room again using an existing coax cable. In addition to providing better coverage, the two WiFi router setup has the added advantage of being able to plug in several wired devices (desktop, printer) in the office and also in the living room (htpc, blu-ray, gaming systems).

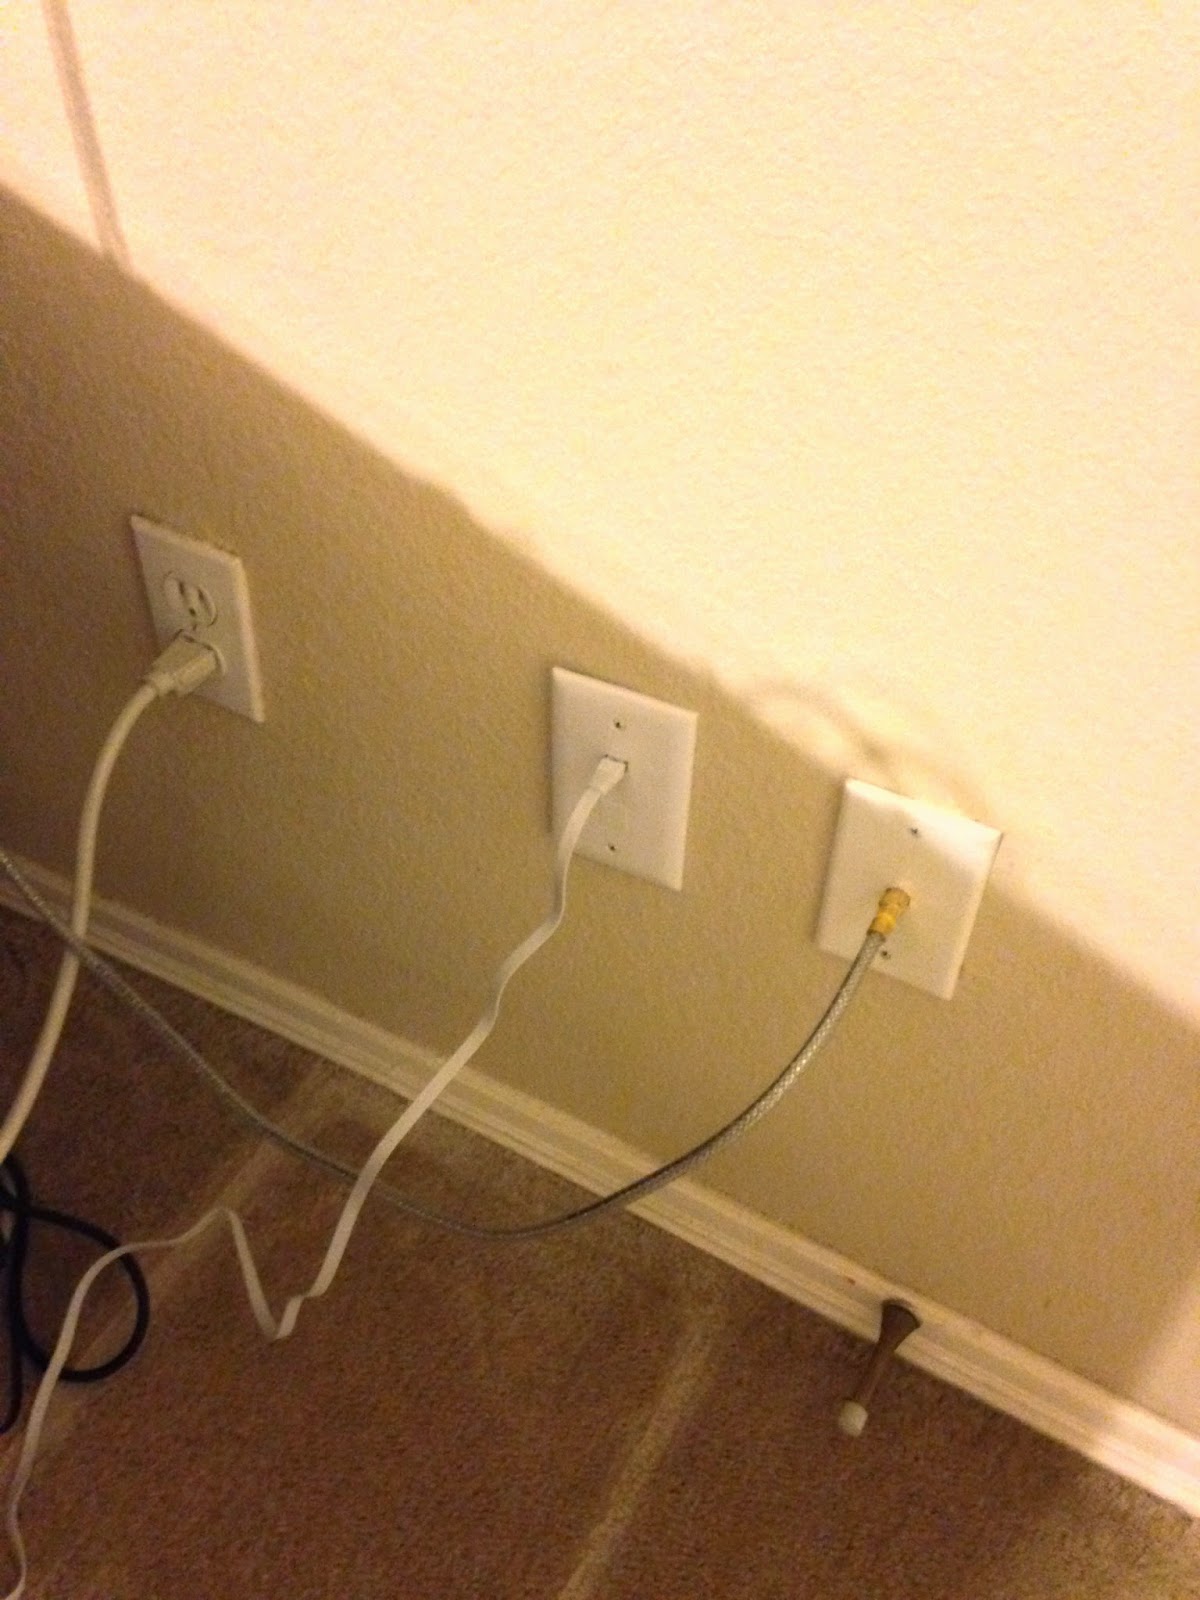
So I decided to run another ethernet cable from the living room to the bedroom to supply the XBOX/Media Center Extender with a reliable wired connection.

Here's the dirty work in progress:


And here's the end result:
 

Home Theater PC (HTPC) Build

I've worked with a lot of computer hardware over the years, but I've never had a need to build a computer from "scratch" .... until now.

I finally gave in and decided to get cable so Rachel can watch HGTV. So I had to get a CableCARD and cable tv tuner so that we could continue to use the Windows Media Center DVR system I had setup to watch Netflix and record over the air high definition broadcast television. I just couldn't stomach paying even more money to the cable company each month to rent cable boxes from them so that I could watch the service I was already paying them for!

Unfortunately, the 6 year old dell desktop wasn't powerful enough to record 5 HD shows at once, so it was time to build a new machine. It is quite a bit more cost effective to build your own computer if any of the following apply: you already have some components, you have a special application in mind, or you need above average performance. All three apply here as I already had a good power supply, blu-ray drive, and several hard drives. Home Theater duty has some special requirements beyond the typical desktop. And, though not as demanding as a gaming enthusiast, HTPCs are working 24/7 and need to respond the instant you press the remote.

So I selected a quad core processor with good integrated graphics, 8 gigs of dual channel RAM, a motherboard with plenty of 6 Gpbs SATA ports, and an attractive enough case. I moved the power supply, remote control, and various drives and TV tuner over from the previous computer.

We've been very pleased with the results. It is quiet, responsive and goes weeks without needing a restart or exhibiting any quirky behavior. It has a 3 TB drive that holds waaaaaay more hours of recorded HD television than we'll ever be able to watch. We can watch/record up to 5 channels at once (3 cable, 2 OTA broadcast). We can ff/rw/pause/commercial skip just like commercial DVR systems, except I own the system and don't have to pay rental fees or monthly charges to anyone. Blu-Ray, Netflix, YouTube, Hulu, etc. are all there too.

You have to be willing to do a little work at the front end. If you don't have a computer geek in your house, it may not be the best option, but it works pretty well for us.

Except for the case, here are the 3 essential parts of a system build/upgrade that usually have to be matched together: Processor, Ram and Mother Board. The technology doesn't evolve as rapidly in cases, drives, etc.


 AMD is still using pins on the bottom of the processor. Intel has moved to contact pads that are less likely to be damaged or bent. But Intel is the innovator, AMD the bargain.

 Here's the (almost) finished machine. Getting this far only took about an hour. And to my dismay, it actually booted right up on the first try! In the old days, you would get it all put together, then spend several hours troubleshooting why it wasn't booting. Invariably it would be because a jumper or dip switch wasn't set properly. These days it is pretty much plug and play. Software work of course took several hours getting windows and all the drivers and other software loaded and configured.

New Bike

When you picture a serious cyclist, the image that comes to mind is most likely not one of a 5' 10" 200lb chubby pale guy. However, I spent a lot of time on my bikes in college and I rode quite a bit when we lived near the Riverside trail.

These days I probably spend more time working on bikes than actually riding them, but as a habitual tinkerer, I'm OK with that.

I got into bikes because they're fun to ride, but also because they were an affordable alternative to cars. If I had the money, I'd have a garage full of old cars to work on. For now I'm satisfied with a garage full of old bikes to work on.

I've built up a number of respectable bikes from parts over the years, including a fixed-gear "fixie" that I built from the frame up out of hand picked new parts, but I decided it was time I had a modern road bike. I debated building a road bike from new parts like I did with the fixie, and I debated carbon fiber, aluminum, titanium and steel. I shopped around and found a great deal on a new complete bike. I couldn't have built one for less money, so I ordered it. 
Schwinn is not the company it used to be, 99% of the bikes are heavy, poorly assembled imported piles of gas pipe. For what its worth, the vast majority of all branded bikes, even high end Treks, Specialized, Cannondales, Giants, etc. come from one of 3 factories in Taiwan. However, there are still some quality Schwinns being made like the Paramount (handmade in the historic Waterford factory if memory serves). I liked this bike because it has the old school look, but has a nice selection of modern components including Shimano 105 running gear. It also has a steel frame and fork. Steel is maybe a pound or two heavier than some of the other materials out there, but as a 200 lb rider, I have no business discussing the weight of my bike. In addition to the "sweet ride of steel" and the "steel is real" mantra, steel has a definite advantage over carbon fiber in that it is much less likely to kill you because you failed to notice a stress crack in the carbon layup. Aluminum or titanium would be nice, but they often come with carbon forks, and I don't feel right about throwing away an expensive carbon fork and replacing it with a steel one. This is the tag that came on the carbon seatpost:


Since I have no desire to examine the seat post for pinch, crack, splinter before and after each ride, I replaced the carbon post with a trusty aluminum one. If anyone wants a carbon post, I'll sell it to you cheap.


The bike comes partially assembled. A normal person would remove the packaging, bolt everything together and go for a ride. But as you can tell by the picture below, I'm no normal person. I disassembled the bike down to the frame so I could give the inside of the tubes a good coating of FrameSaver rust preventative spray. Really not necessary if you don't park your bike in the ocean, but I figure it couldn't hurt.


Here's the end result. Notice the aluminum seatpost, Brooks tensioned leather saddle and my own clipless (pedals that use snap-in cleats are called clipless because they do not have toe clips and straps that were used to secure riders feet in the old days, not to be confused with flat platform pedals). The tensioned leather saddle is by far the most comfortable saddle ever made. Forget gel and foam padding, tensioned leather is the only way to go. Most people have never experienced these saddles because they are expensive and require more maintenance than plastic saddles, but they are so worth it.

Thursday, August 22, 2013

Tech - Solid State Drive

I tend to accumulate old computers. I freshen them up and put them to work.


One of the best ways to breathe new life into an old computer is to install a solid state drive. The increased read/write time improves responsiveness. 


Here's the old hard drive along with an external enclosure so I can use the older, higher capacity, but slower drive as a portable drive for backing up data. 

Home Improvement - Hose Reel

When we first moved into our house a few years ago, I installed a wall mounted aluminum hose reel so Rachel could water her plants. 


I decided to install another on the opposite side of the house so I can wash cars in the driveway. 


The mounting tabs on the hose reel don't line up with the mortar so I anchor some pressure treated lumber and mount the hose reel to the wood. 


Using the wood has an added advantage of adding some space between the brick and the hose to prevent scraping a full reel. 


I cut a hose to the correct length and use a hose repair kit to finish the end. This way I can tuck the hose that goes to the reel up against the wall and out of the way of the mower. 

Saturday, July 13, 2013

Home Improvement - Ceiling Fan


This is the only HVAC vent in our guest room. The room isn't very big and the window faces north. But the room still gets stuffy in the summer. 

This is the light fixture that was on the ceiling. 


Picked up this nice 52 inch fan at Lowes. 


A little over an hour later...

Ceiling fans are pretty easy to install and make a big difference. Just be sure to cut the power at the breaker box and make sure the fixture box is supported. 

The previous homeowners forgot the latter point and installed a fan on the back porch. It held for a while, but a few months after we moved in I noticed the fan was severely tilted. Turns out they had replaced a light fixture with the fan and didn't check to see that the electrical box was supported. I had to replace the box with an "old work" ceiling fan box from the hardware store. This goes up in the ceiling and extends out to the joists. 

Monday, June 10, 2013

Tax - Deferred Tax Liability

I remember back when I was studying for the CPA exam how the ones who had gone before would wax philosophical about how nice it was to be finished with the exam and would tell me all about how nice it was to have free time, or even "a life."

Now that I've passed the exam, I try to be a little more encouraging to those who are preparing. Today someone asked me a great question about Deferred Tax Liabilities; one of my favorite topics. You have to be good with GAAP and tax to be able to work through DTA/DTL questions.

This particular reviewer asked why would an increase to prepaid expense increase the deferred tax liability?

Under GAAP prepaid expenses are recorded as assets since they represent a probable future benefit.

So in journal entries, we debit prepaid expense and credit cash when we make the payment and debit expense and credit prepaid expenses when the we receive the benefit.

Fortunately for tax accountants, the tax rules for revenue and expense recognition often differ from GAAP. Some differences are permanent. Fines and penalties are deducted from net income on a GAAP income statement, but can never be deducted from taxable income. This is called a permanent book tax difference and does not result in a DTA/DTL.

Temporary differences have to do with timing. In the case of prepaid expenses, the tax deduction is taken in the period payment is made. But the expense will not be recognized under GAAP until a later period when the benefit is received. This temporary difference results in a deferred tax liability because we pay less tax now due to the current deduction, but will pay more tax later when the difference reverses and we recognize the expense for GAAP, but have already taken the deduction for tax in a prior period.

In other words, an increase to a prepaid expense indicates that we have a deduction that decreases tax income currently as compared to book income and at some point in the future this difference will reverse and increase tax income as compared to book income, thereby generating a deferred tax liability.

Finance - Shaving

So I'm on my last  shaving blade. Pretty amazing since the last time I bought any was June 2010. At that time, I bought a box of 100 blades for under $20. You'd be lucky to buy 6 or 8 of the leading cartridges for that price. Furthermore, I get a much better shave with less irritation. Sometimes the old ways work better; and for much less money. You gotta hand it to the marketing guys over at Gillette though. I wonder how many more blades they're going to cram into a razor before they start telling us fewer blades is better?

Sunday, June 9, 2013

Cars - Manual Transmissions & Clutch Delay Valves

I like driving cars with manual transmissions. My last 3 cars have had manual transmissions. For the most part a car with a manual transmission is cheaper to buy, often gets better fuel economy, and is a little peppier than the same car with an automatic.

But the real reason I like manual transmissions is driver involvement. I enjoy driving. Most people my age, however, seem to view it as a burdensome and expensive way to get from point A to point B. But with the right car, the right road, and the right conditions, driving for me is a great pastime full of challenges and rewards. Steering is carried out not only with the steering wheel, but also involves the careful use of the right foot. Deceleration is not a simple matter of pressing on the brake pedal, but also involves downshifting to the correct gear.

After one has driven a manual transmission for enough time, driving an automatic seems like driving bumper cars at the carnival, or a Power Wheels toy car. No apex, no matter how expertly negotiated, is ever as rewarding in an automatic as it is in a manual. There's just something special about using all four limbs to make a car go.

All that being said, there are a few things that can spoil a manual transmission. My last car, a Miata, had a bad clutch. It had an overly hard friction material that caused a shudder during shifts at low RPMs. After about 10 hours of hard labor, I managed to replace the clutch and the problem was gone.

My current car, a 3 series BMW, came with something called a "Clutch Delay Valve" or CDV.


This is about $0.75 worth of plastic that sits in the hydraulic line between the clutch pedal and the transmission. The job of the CDV is to slightly delay the engagement of the clutch pressure plate, ensuring that an unpracticed driver doesn't inflict undue stress on the drivetrain of the vehicle. Evidently the Germans don't think Americans know how to drive manual transmissions, as the European cars are not equipped with this valve.

Anyway, this valve only serves to frustrate those of us who know how to drive a manual. It causes the clutch pedal to feel vague and disconnected from the transmission. It makes it difficult to identify the actual point of engagement. And of particular concern to me, it causes a rather awkward 1-2 upshift.

Fortunately it is much easier to remove this valve than it was to replace the clutch in the Miata. Took the car for a quick drive and the difference was immediately noticeable.

Finance - Changing your own oil

At first glance it would seem obvious that a gainfully employed professional should not waste his/her time changing oil when the service is so readily available and inexpensive. From a pure time value of money perspective, I would have to agree. Especially since it takes a practiced DIY home mechanic 1-2 hours to do an oil change, whereas a shop with the aid of hydraulic service lifts can do the job in under 30 minutes.

The decision for me swings on the intangibles. First of all, I enjoy working with my hands. I find this sort of thing to be some of the best quiet time and a great way to decompress.

Second, I know that I do a better job than most oil change shops. This is because oil will drain out of a car for an hour or more, therefore it is impossible for a shop to do a complete, proper oil change in under 30 minutes.

Third, I know what I'm getting. Unless you watch the work being done at the shop, you have no way of knowing what products are actually being used on your car. You paid for synthetic, but are you getting conventional? I know I put good synthetic oil in and used a quality filter, so I can confidently reduce the frequency of oil changes. I only have to change the oil about once or twice a year.

Fourth, if something goes wrong, I know about it and can make sure it gets fixed. Shops and the DIY mechanic are both at risk of making mistakes. But, I can reduce my risk by going slow and taking care not to strip threads, or over-tighten the drain plug, I can double check everything. The shop will be in a hurry, and sometimes if they strip the threads, you won't know about it until the next oil change.

And finally, it provides a sense of pride. If you can change your own oil, I'd imagine you're in the top 10% of drivers as far as knowing anything about cars. It fascinates me how so many people rely on their cars so much, yet know so very little about them or how they work.

Ultimately, choosing to change my own oil is a more of an emotional than a financial decision for me, but don't knock it 'til you try it.

Cars - Oil Change

The oil light came on in Rachel's Pilot this week. So I thought a basic oil change would be an acceptable first post.

First, a disclaimer: working on vehicles is dangerous, do so at your own risk.

As with most projects, it is important to have the right tools. My dad always said "it is a poor workman who blames his tools," but his dad always said "poor people have poor ways."

In addition to the usual oil change tools (ramps, jack stands, drain pan, socket set) and supplies (oil, filter). It helps to have a filter wrench. I like the cap style:


The hardest part is getting under the vehicle safely. Drive on ramps are a good option for front wheel drive cars. Be sure to put jack stands under the car in case the ramps fail. Wheel chocks are a good idea too.

 
Once the car is safely up in the air, drain pan in position, it is a simple matter of locating and removing the drain plug, and removing the oil filter.


The old oil will drip for a long time. The longer the better. I usually get impatient after about 30 minutes.

Put the new filter on, put the drain plug back in, refill with the appropriate amount of new oil and reset the oil change light.


Monday, May 22, 2006

Boatbuilding: The Red Rhombus

One of my first few summers home from college, I got the idea to build a boat. I naively thought it would be cheaper to build one than to buy one, I quickly learned that is not the case. But I also learned a lot about boatbuilding.

I did some online research and located some different plans. I came across the concept of a "one sheet skiff" (OSS). The challenge is to build a boat almost entirely from a single 4' x 8' sheet of plywood.

Several designs look like miniature rowboats, but the displacement was not sufficient to hold two adults. I really wanted to be able to get out on the water with my girlfriend (now wife) in a boat that I built myself, so I kept searching for a plan that would provide sufficient displacement.

The real calculations are much more complicated, but the basic idea is that if you calculate the interior volume of a vessel (how much water it would hold) and multiply that volume by the weight of water, you have a rough idea of how much water it would take to sink. So, by toggling the height in your volume calculation, you can determine how much freeboard you will have at a given weight.

I came across what looked like a good design that maximized volume and still looked something like a boat and would provide enough room and displacement for 2 adults, so I jumped right in and started building.

The first step involved cutting the sheet of plywood into "pickets:"

Then I added 2 extra ribs to the original design for extra strength and a little easier construction:
 
Then finish by joining the tips and sides of the pickets together using more or less standard hard chine building techniques with lots of marine epoxy and sawdust/baking flower fillets.

Waterproofing comes from a couple coats of thinned epoxy.
 
Then the finishing touches: A lot of paint and some oars and oarlocks.
 
So it floats and holds two adults. But unfortunately, I learned the hard way an important lesson about hull design: symmetrical shapes are very prone to tipping. The Red Rhombus is so tippy that I had to remove the seat cushions to keep the center of gravity as low as possible. If I ever build another boat, I'll be sure to build one that is shaped so that the more it tilts to one side, the more water it displaces.

All in all, a good learning experience and not a bad way to spend a summer.